Assembly Guide — IV Pole Mount v2 (Universal Device Holder)
Before You Start
Verify your printed parts pass all checks in the Print Guide before assembly. Do not use parts with visible layer delamination, cracking, or significant warping.
V2 vs V1 — What's Different
The assembly process for v2 is identical to v1. The v2 cradle has a different exterior shape but the same pole channel, general-purpose pocket, and thumbscrew interface. These instructions apply to both versions.
No device compatibility list yet
v2's pocket is general-purpose — it was originally photographed with a Curlin CMS6000, and may fit that or other similarly-sized devices, but we don't have a confirmed list. Test-fit your device before relying on it, and tell us how it went. Need a tighter pocket? Print v3 →
What You Need
| Item | Source |
|---|---|
Printed cradle (OpenPoleMount_IV-Pole_v2.stl) |
Print 1x |
Printed thumbscrew (thumbscrew_v14_flat_Thandle.stl) |
Print 1x |
| Standard home IV pole (~25mm / 1 inch diameter) | Your existing equipment |
| Your device (test-fit first — no confirmed compatibility list yet) | Your existing equipment |
No tools required — assembly is fully hand-tightened by design.
Assembly Steps
Step 1 — Thread the thumbscrew
Insert the thumbscrew into the threaded hole on the side of the cradle. Turn clockwise by hand until it fully engages, then back off 2–3 turns so the pole channel is open enough to slide onto the pole.
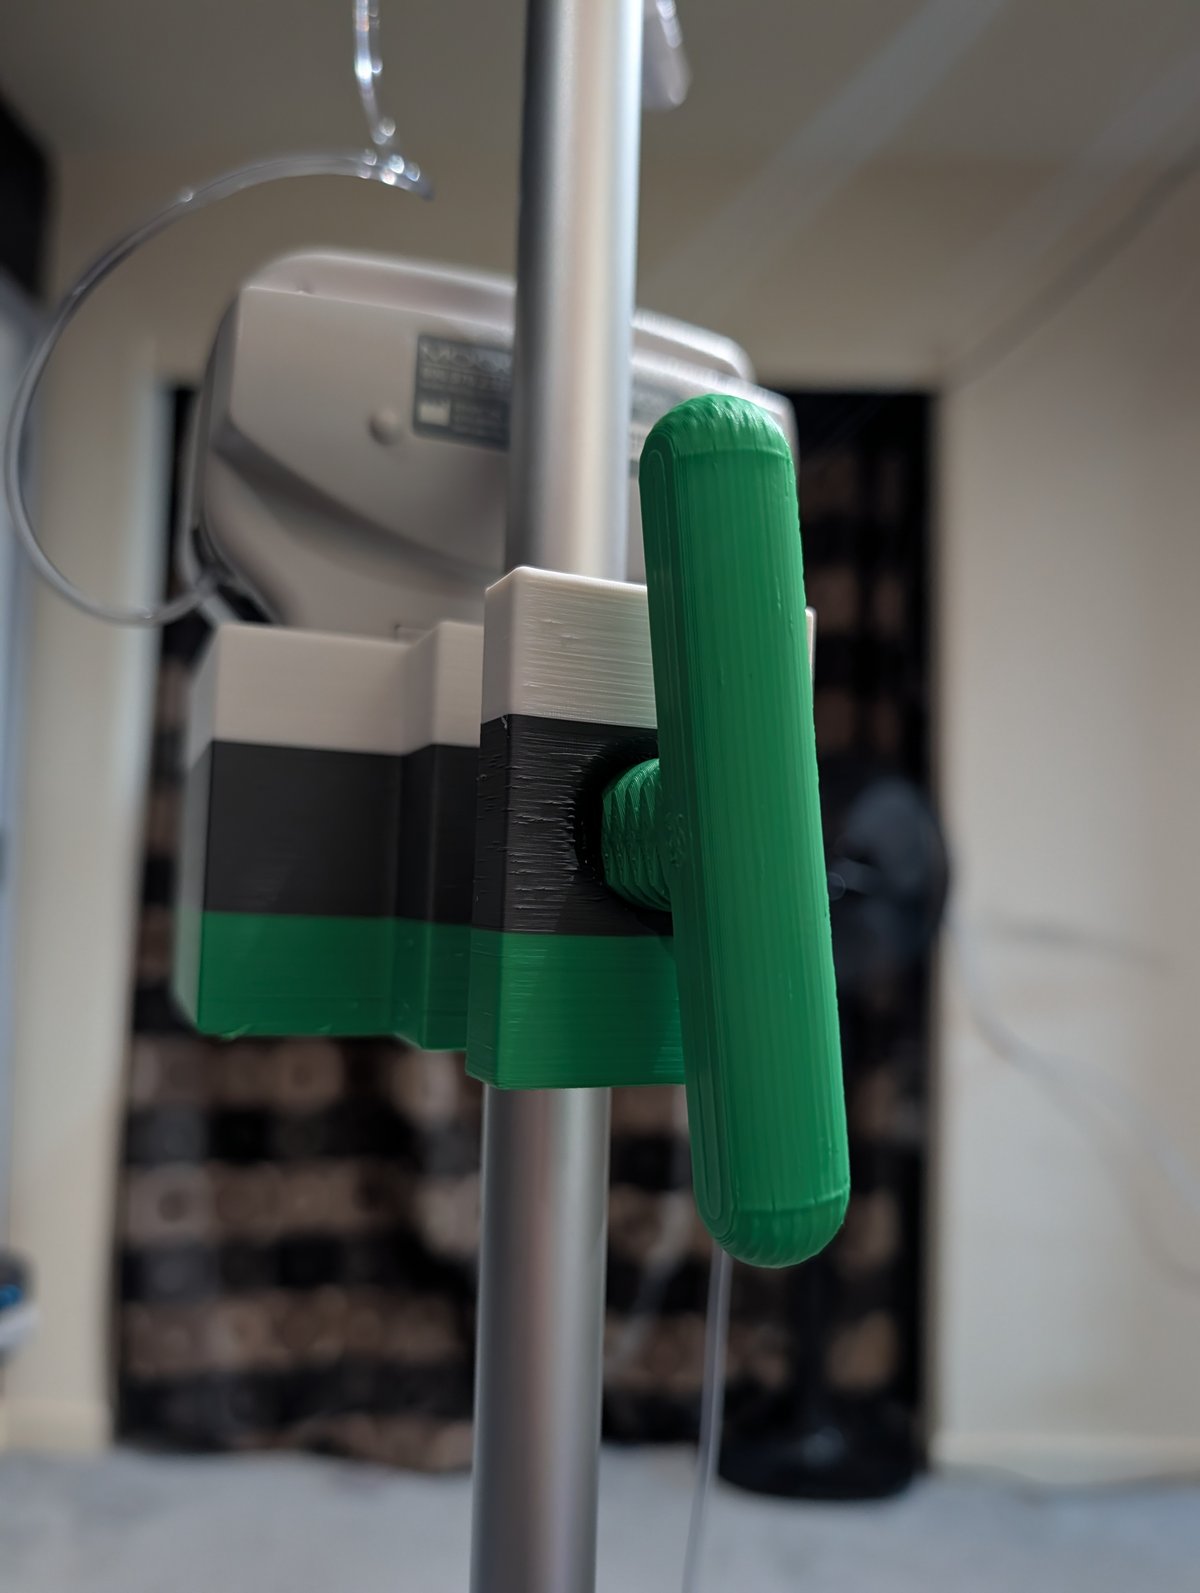 T-handle thumbscrew threaded into the mount — hand-tight only
Step 2 — Slide onto the pole
Position the cradle on the IV pole at the height where you want the device. The pole slides into the vertical channel on the back of the cradle.
Step 3 — Tighten
Turn the thumbscrew clockwise by hand until it firmly contacts the pole. Give it one additional firm quarter-turn. The cradle should not slide when you push down on it with moderate force.
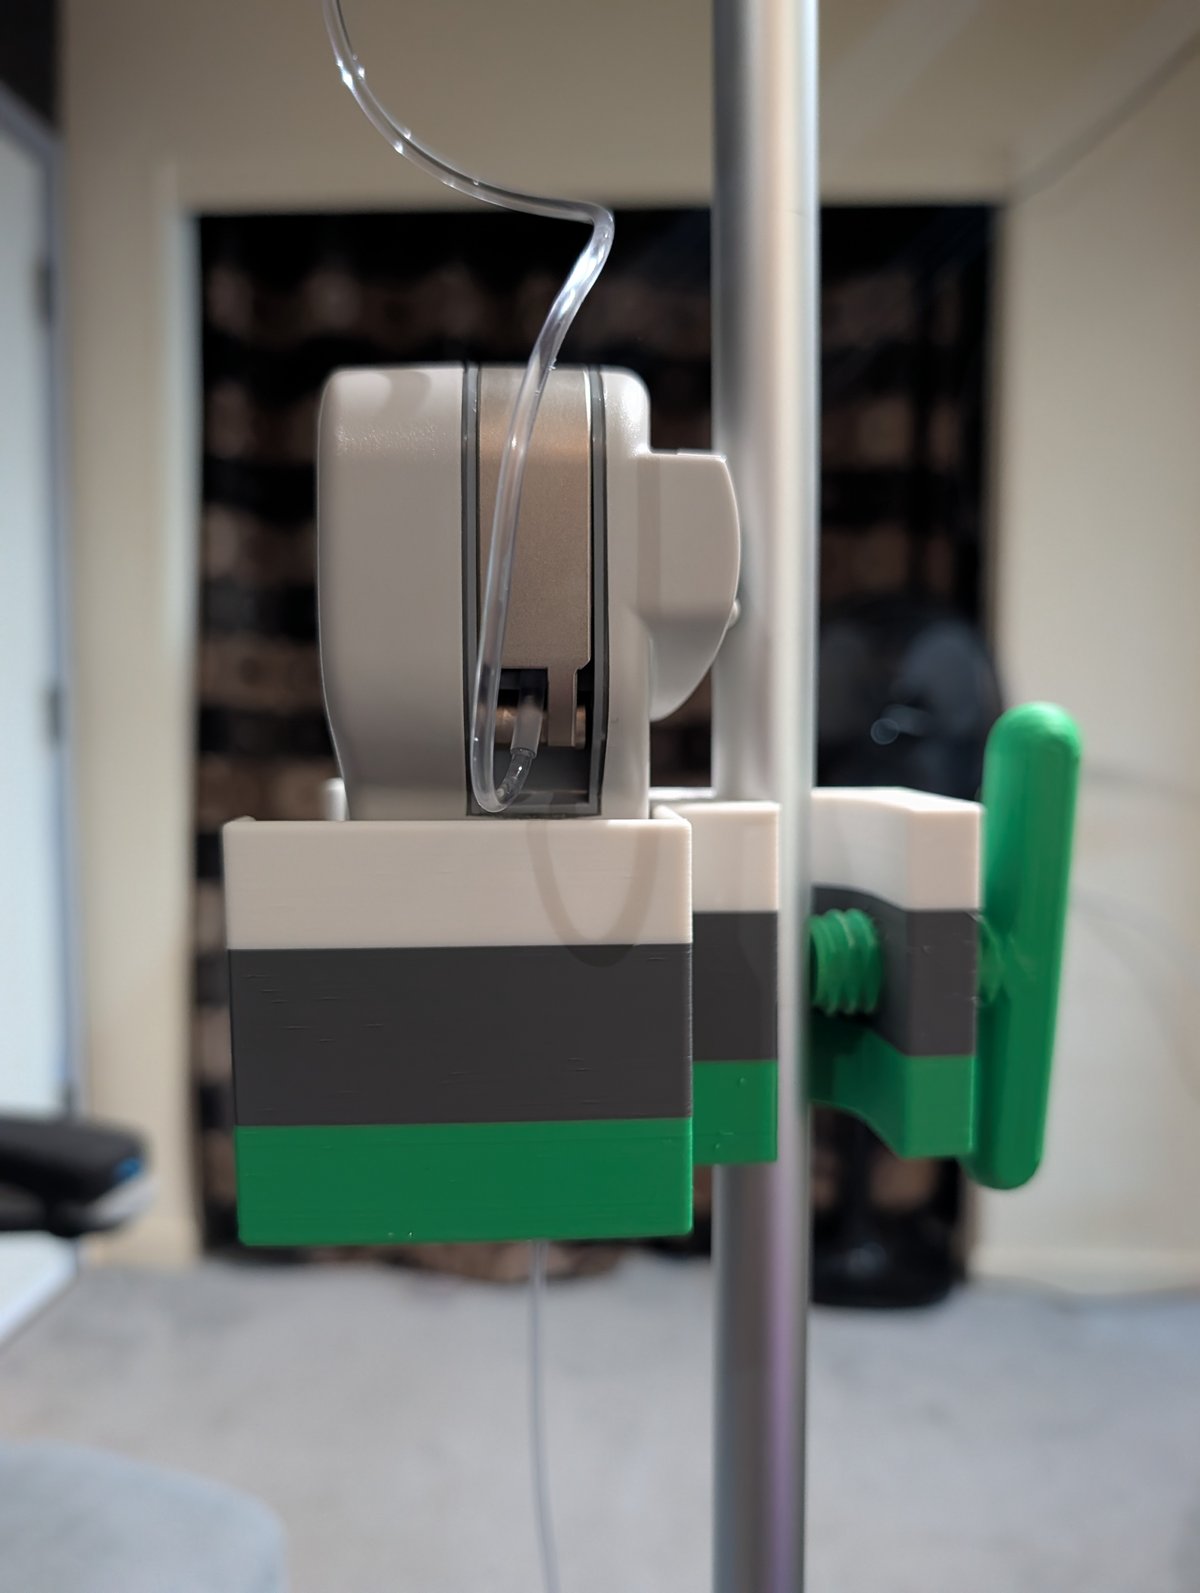 Rear view showing the thumbscrew engaged with the pole
Do Not Over-Tighten
Over-tightening can crack the printed part. Hand-tight plus one quarter-turn is sufficient. If the cradle slips at this tension, inspect the print quality and reprint if needed — do not force beyond hand-tight.
Step 4 — Install the device
Lower your device into the cradle from above. It should seat into the pocket without forcing. Verify it is fully seated and does not rock or tip.
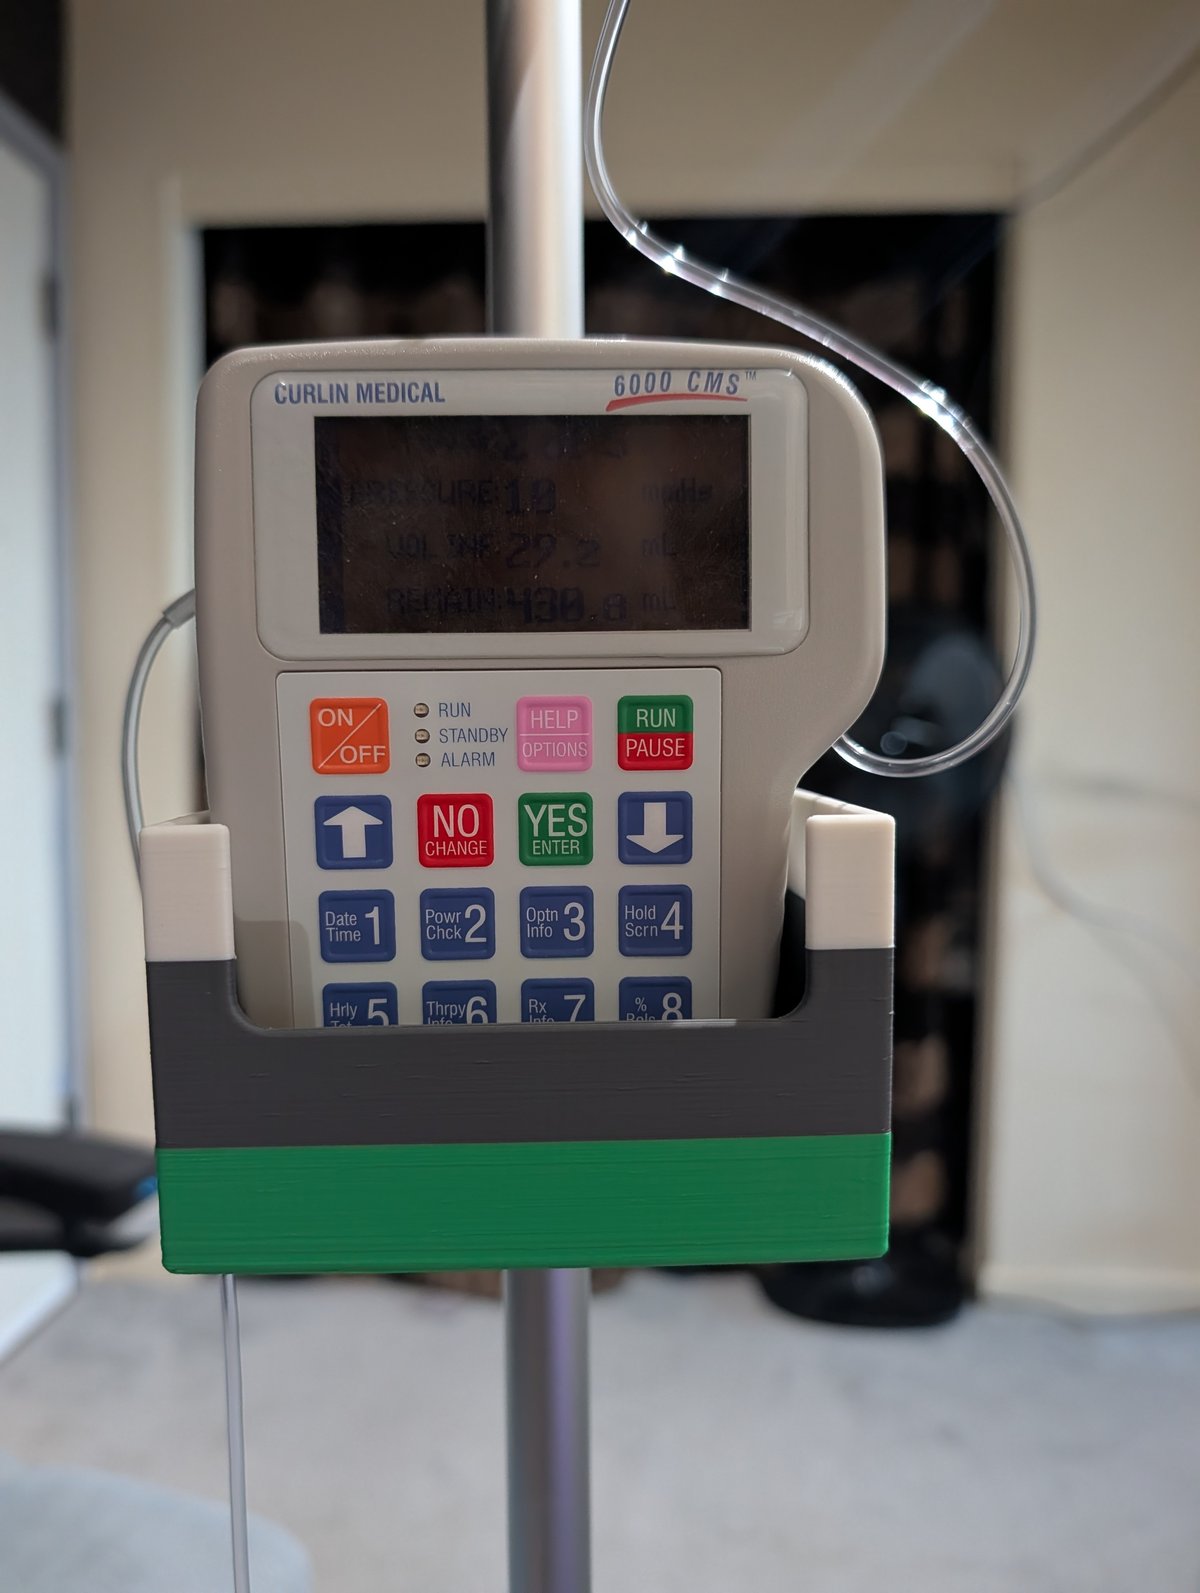 Example fit — Curlin CMS6000 fully seated in the v2 pocket, front face accessible, tubing free to exit
Step 5 — Verify stability
Before connecting any lines or cabling:
- [ ] Cradle does not slide down the pole under firm downward pressure
- [ ] Device does not tip or rock in the cradle
- [ ] Tubing or cabling can exit the device without creating strain on the mount
- [ ] IV pole base is fully spread and stable on the floor
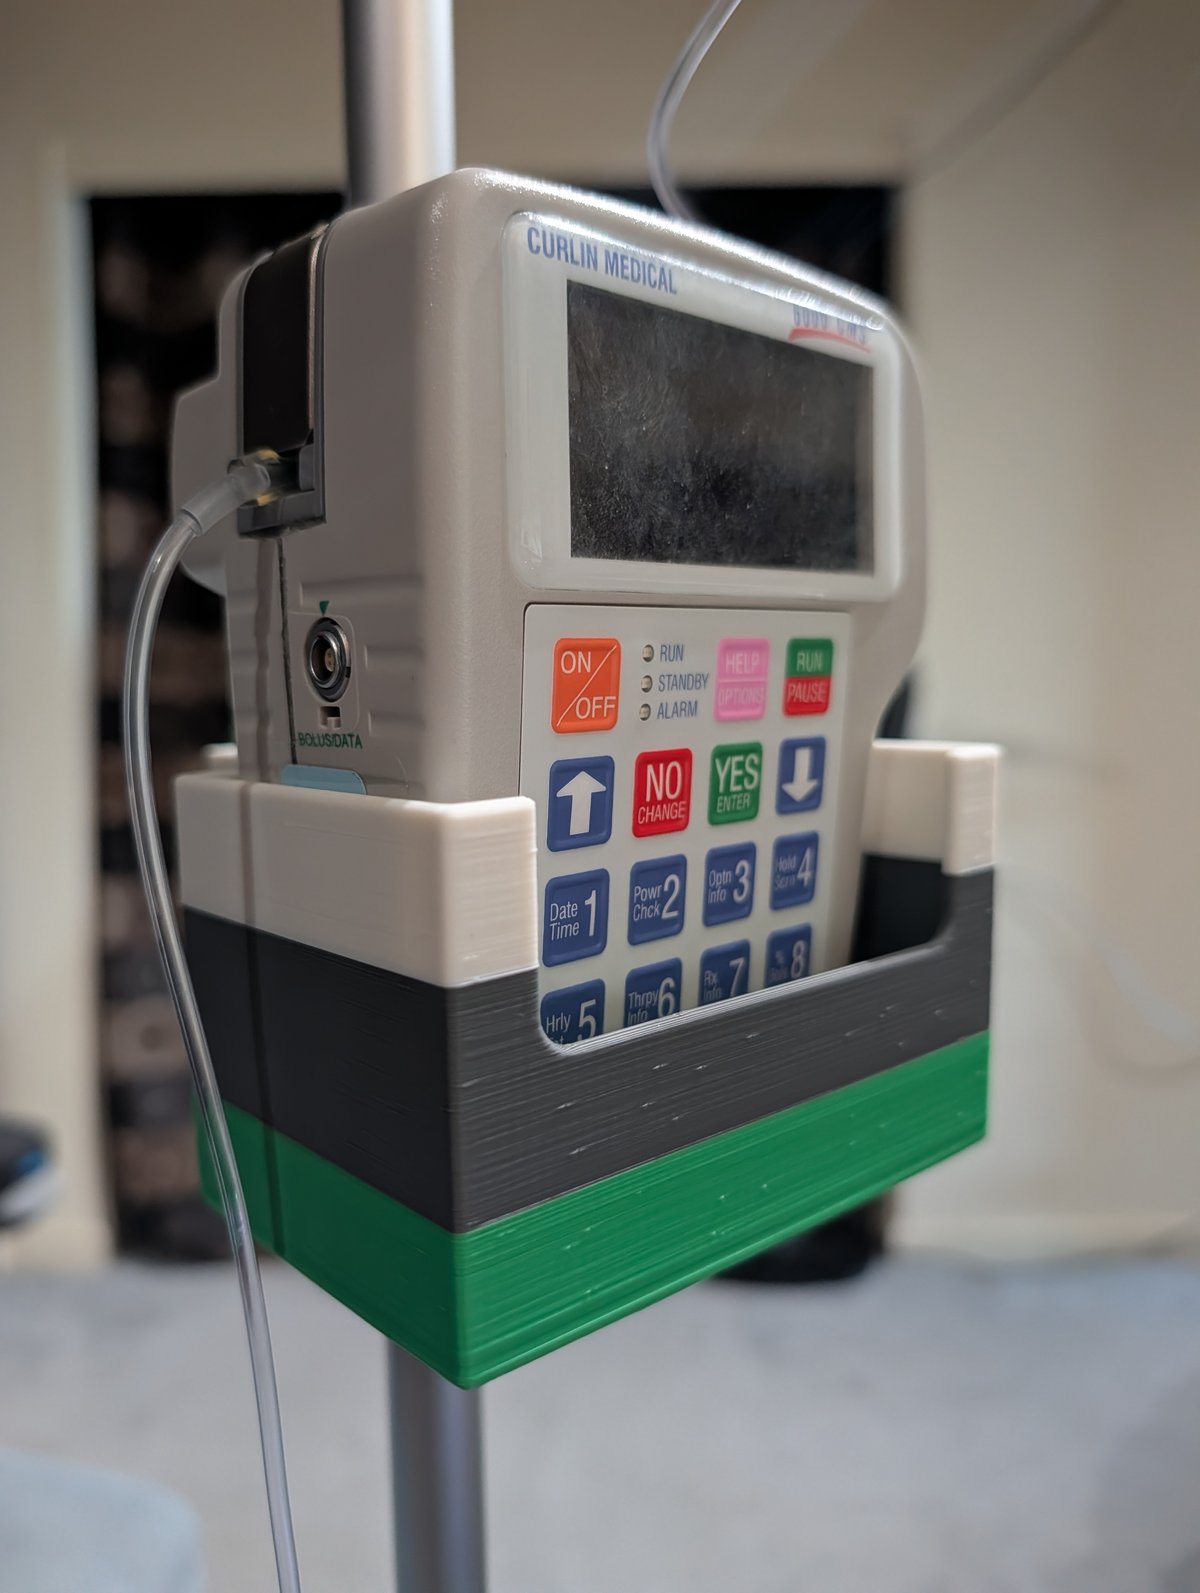 Completed installation — device in cradle, tubing routed, mount secure on pole
Adjusting Height
To reposition:
- Remove the device from the cradle
- Loosen the thumbscrew 2–3 turns
- Slide the cradle to the new height
- Re-tighten the thumbscrew
Do not attempt to slide the cradle while the device is seated in it.
Removal
- Disconnect any lines or cabling from the device first (follow your device's instructions)
- Lift the device straight up out of the cradle
- Loosen the thumbscrew fully
- Slide the cradle off the pole
Troubleshooting
| Problem | Likely Cause | Solution |
|---|---|---|
| Cradle slides down the pole | Thumbscrew not tight enough or pole diameter too small | Tighten more; check pole diameter matches design spec |
| Device rocks in the cradle | Device isn't a close match for this pocket, or print tolerance issue | Try v3 if you need a tighter pocket; otherwise open an issue with your device and we'll help build the compatibility list |
| Thumbscrew won't turn smoothly | Print stringing in threads or warped thread hole | Clean threads with brush; if damaged, reprint thumbscrew |
| Pole doesn't fit the channel | Pole diameter differs from design | Open an issue with your pole diameter |
| Part cracked during assembly | Over-tightening or under-printed | Reprint at ≥25% infill, ≥1 mm walls; hand-tighten only |
Need Help?
If your device doesn't fit or you're having trouble with assembly, open an issue on GitHub. Include a photo if possible — we want to help.